Grown Your Own Luffa
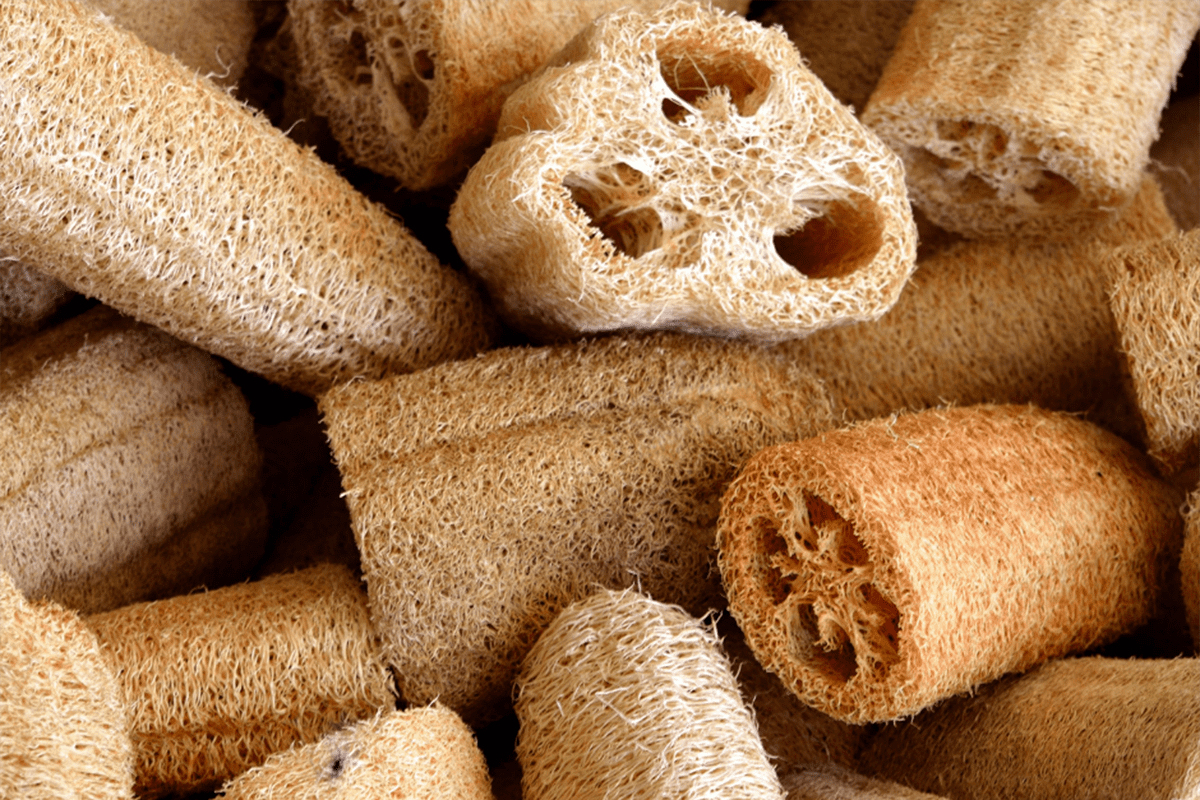
Did you know that you can grow your very own spa quality luffas (or loofahs) at home? Luffa sponges are great for skin exfoliation and are handy for scrubbing pots and pans as well.
Growing Luffa
- If you live in a chilly zone, start your luffa seeds indoors about 6 weeks before the last frost
- Soak luffa seeds in water for 24 hours prior to planting
- Germinate in a warm area
- Once your plants have their first set of leaves, transplant them to biodegradable pots
- Luffa plants are prone to transplant shock so you’ll want to wait until the weather and soil are warm to start hardening your seedlings
- After a week or so, plant your luffa plants in an area that gets full sun
- Luffa plants vine so plant your seedlings at the base of a strong structure
- Be sure to cover your plants if the weather turns cold (warm luffa plants equals happy luffa plants)
- Keep your luffa nice and watered
Harvesting Luffa
- Luffa can be picked once they are dried out and brown
- Then all you have to do is peel them and rinse out the seeds
Follow our blog for more great gardening tips!
Herb-Infused Vinegar
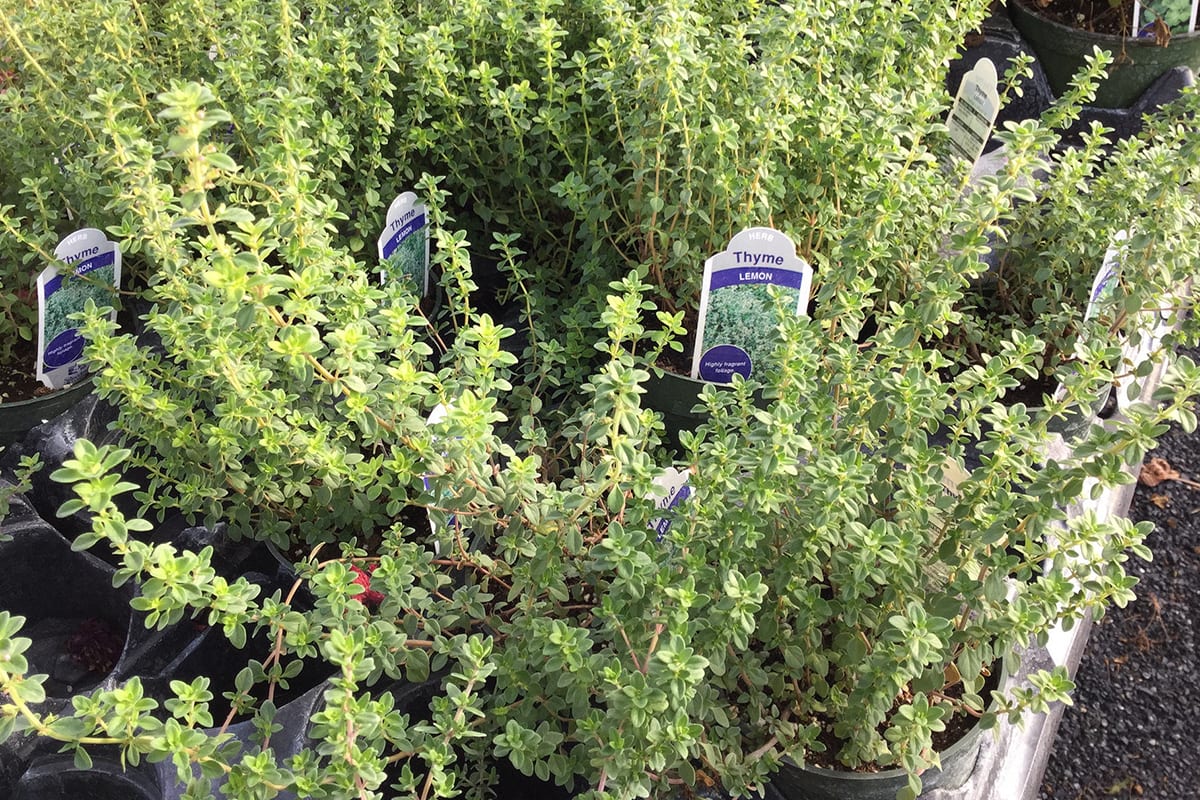
Herb gardens are wonderful for cooking delicious meals, making DIY beauty treatments, and even natural household cleaners. One of our new favorite uses are homemade vinegars!
You’ll need:
- 2 cups wine, rice, or apple cider vinegar
- 5 sprigs of lightly crushed herbs (you can choose from oregano, rosemary, tarragon or thyme)
- For an extra kick, you can add 1 small fresh chile and 1 clove of garlic
- Jar with tight-fitting lid
To make:
Add herbs and vinegar to your jar and let it sit to infuse for 5-6 days. This will allow your flavors to blend. Strain your vinegar with a fine mesh sieve into a bottle of your choice. Feel free to add a sprig of herbs and a few chiles and garlic cloves to make it fancy. Store in the refrigerator.
Visit us on Pinterest for more tasty recipes!
Grow-Your-Own Pizza Garden

Pizza is delicious. Crispy crust, gooey cheese, and whatever toppings your heart desires. Make that pizza taste even better (and better even better for you) with fresh ingredients straight from your pizza garden!
What you’ll need:
- 4×4 garden bed (you can also use containers if you require mobility)
- Raised bed soil
- 1 Greek oregano
- 1 Sweet basil
- 1 Spicy Globe basil
- 2 Italian Parsley
- 1 Rosemary
- 22 Onions (you can use whichever onions you prefer for pizza)
- 1 Roma tomato (with cage)
- 1 Banana pepper (with cage)
- 1 Green Bell pepper (with cage)
Be sure to set up your garden in an area that gets enough sun (tomatoes and peppers thrive in full sun). Follow spacing on the plant labels. If the weather cools back down after you’ve planted your veggies (sometimes weather is unpredictable), simply place a terracotta pot over it to shield it from light frosts. Just remember to remove it after the weather warms up so that your plants get the sunlight they need.
Have fun and enjoy!
Visit our blog for more gardening tips and tricks!
Repurposed Jack O’Lanterns
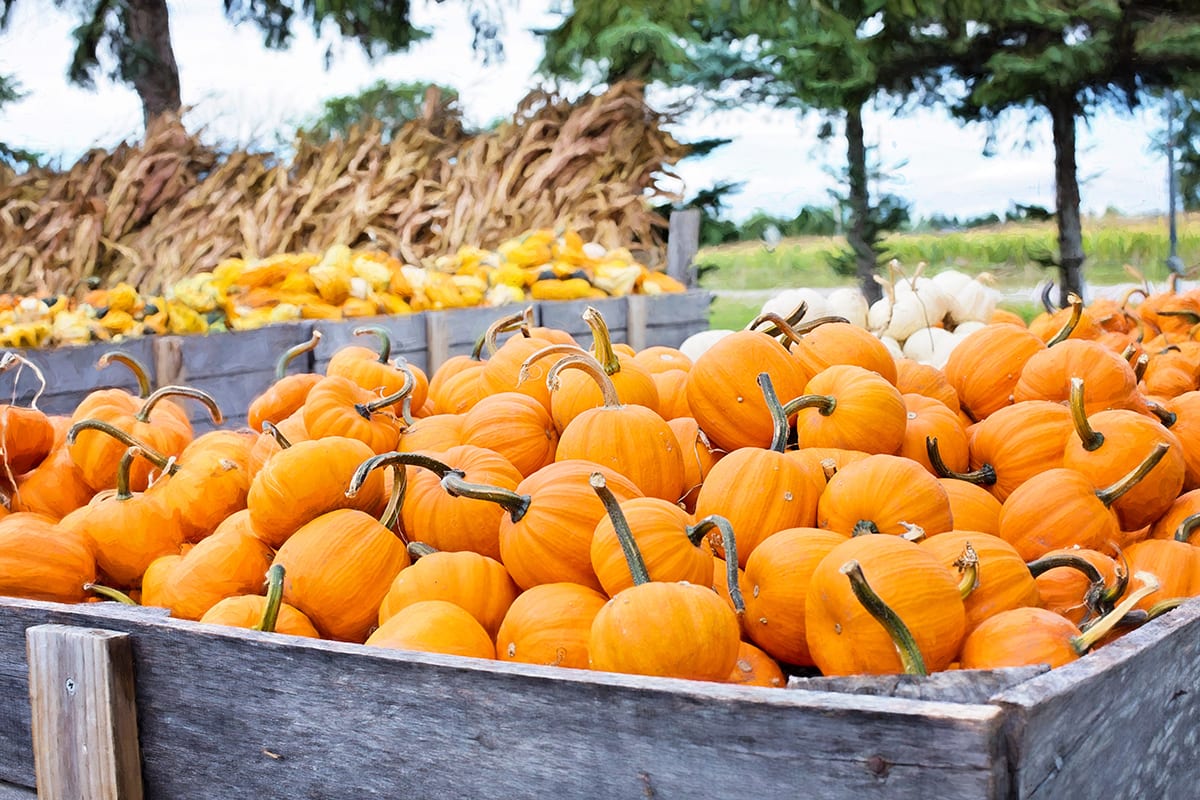
Halloween is over and it’s time to put that Jack-O-Lantern to better use. At Back Home on the Farm, we smash all pumpkins at the end of the season and give the bits to our farm critters. Here are some great ways to reuse your holiday pumpkins!
Awesome Compost
Turn your decaying Jack-O-Lanterns into plant-loving compost for your garden. Begin by removing all candles or battery-operated tea lights along with any other decorations attached to the pumpkin (ribbons, googly eyes, etc.). Please note, pumpkins that have been painted, coated in sealant, or covered in glitter cannot be composted. Be sure to remove all the pumpkin seeds as well. No need to start a pumpkin patch in your compost bin!
Fall Feeder
Hollow out one side of your leftover pumpkin and fill with bird seed. If you have a bunch of baby pumpkins, you can tie a bit of cord at the top and hang the small feeders from trees in your yard. The birds will LOVE them!
Critter Treats
Do you have cows, goats, pigs? Maybe just wild birds and squirrels? All kinds of animals would be very happy to munch on your leftover pumpkins.Our farm animals LOVE pumpkins! Pumpkins are an excellent source of source of vitamin E, iron, magnesium, potassium, zinc and essential fatty acids.
Visit our blog for more fun pumpkin tips!
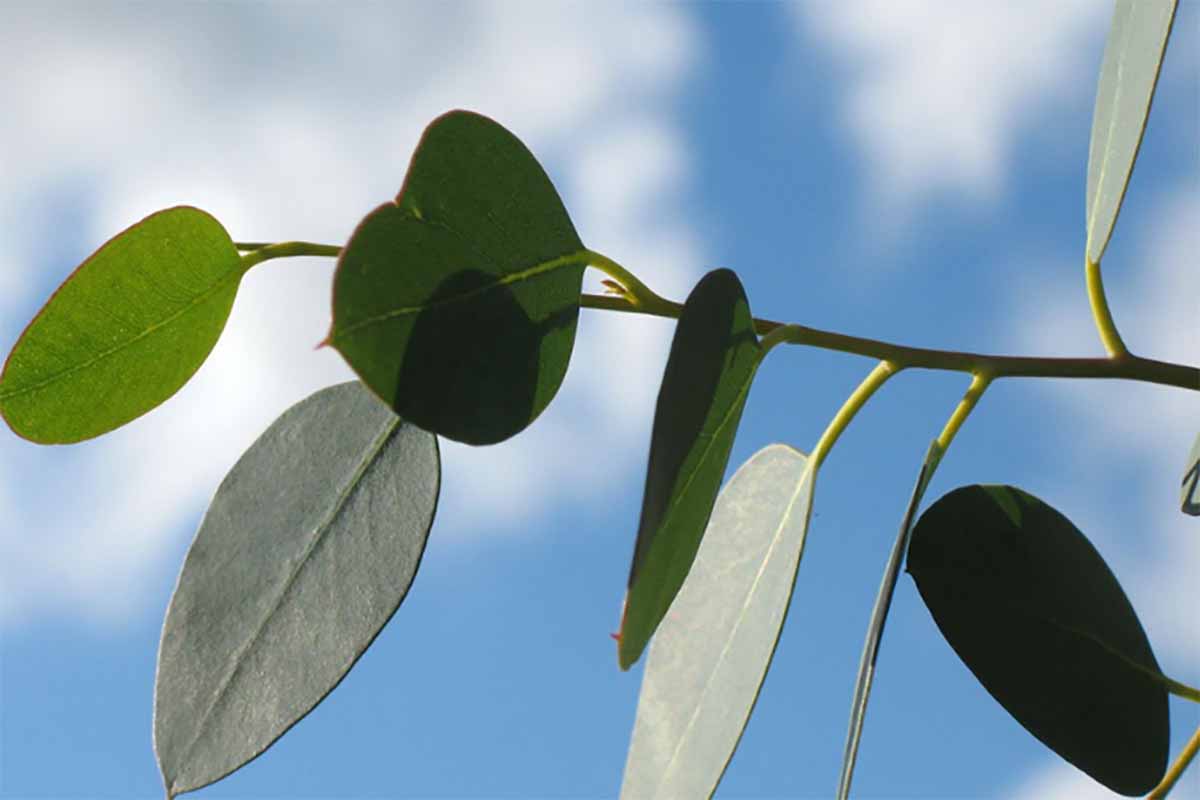 Who doesn’t love the smell of eucalyptus! In addition to being visually appealing, the fragrant leaves can be used to make an