
Window Box Gardening

Window box gardening is a fun way to add charm and color to your home, regardless of your gardening space limitations. These compact, versatile containers can be filled with various plants, from vibrant flowers to aromatic herbs, making them a perfect choice for city dwellers and suburban homeowners. Here’s a quick guide to help you create and maintain a beautiful window box garden.

Getting Started: Choosing Your Window Box

  • Material: Window boxes are made of various materials, including wood, metal, plastic, and terracotta. Choose one that complements your home’s exterior and suits your style.
  • Size: Ensure your window box is at least 8 inches deep and wide enough for healthy root growth. The length should match or slightly exceed the width of your window.
  • Drainage: Proper drainage is crucial. Look for boxes with drainage holes, or add a layer of gravel at the bottom to prevent waterlogging.

Selecting Plants for Your Window Box

  • Flowers: For a lush, layered look, choose a mix of trailing, upright, and filler plants. Popular choices include petunias, geraniums, marigolds, and lobelia.
  • Herbs: If you prefer a functional garden, herbs like basil, thyme, parsley, and mint are excellent choices for window boxes.
  • Vegetables: Some vegetables, like lettuce, radishes, and cherry tomatoes, can thrive in window boxes.
  • Seasonal Rotation: Consider rotating plants seasonally to keep your window box looking fresh year-round. Pansies and violas are great for spring, while mums and ornamental kale add autumnal beauty.

Planting Your Window Box

  • Soil: Use a high-quality potting mix that provides good drainage and nutrients. Avoid using garden soil, which can be too heavy and compacted for container gardening.
  • Plant Arrangement: Place the tallest plants in the center or back of the box. Fill in with medium-height plants and finish with trailing plants along the edges.
  • Spacing: To avoid overcrowding, follow the spacing recommendations on plant tags to ensure each plant has enough room to grow.
  • Planting Depth: Plant at the same depth as in their original containers. Firm the soil gently around the roots, and water thoroughly after planting.

Caring for Your Window Box Garden

  • Watering: Window boxes dry out quickly, especially in sunny locations. Water regularly, keeping the soil consistently moist but not soggy. During hot weather, you might need to water daily.
  • Feeding: Use a balanced, water-soluble fertilizer every 2-4 weeks to keep your plants healthy and vibrant. Avoid over-fertilizing, which can lead to excessive foliage growth at the expense of flowers.
  • Pruning: Regularly deadhead spent blooms and trim back any leggy growth to encourage more blooms and maintain a tidy appearance.
  • Pest Control: Look for common pests like aphids and spider mites. To protect your plants, use organic pest control methods, such as neem oil or insecticidal soap.

Creative Ideas for Window Box Gardens

  • Theme Gardens: Create themed window boxes, such as a butterfly garden with nectar-rich flowers or a culinary herb garden for your kitchen window.
  • Color Schemes: Choose a color scheme that complements your home’s exterior. Monochromatic schemes can be elegant while contrasting colors add a vibrant pop.
  • Seasonal Decorations: Add seasonal decorations, such as mini pumpkins in the fall or ornaments during the holiday season, to enhance the visual appeal.

Visit our blog for more tasty recipes and gardening tidbits!

Shade-Loving Plants

Gardening in the shade can be as rewarding and colorful as cultivating sun-loving plants. Shade gardens offer a calm, serene retreat, often filled with lush foliage and vibrant blooms. Here are some top shade-loving plants, including hostas, impatiens, heuchera, ostrich ferns, and Japanese-painted ferns, to help you create a stunning shade garden.

 Hostas: The Shade Garden Staple
Hostas are beloved for their large, attractive leaves that come in shades of green, blue, and yellow, often with striking variegation. They are incredibly hardy and can thrive in deep shade.

Growing Tips:
Soil: Well-draining, rich in organic matter.
Water: Keep the soil consistently moist but not soggy.
Maintenance: Hostas are low-maintenance but benefit from mulching and occasional fertilizing.

Varieties to Try:
‘Blue Angel’: Known for its large, blue-green leaves.
‘Golden Tiara’: Features green leaves with golden edges.

Impatiens: Adding a Pop of Color
Impatiens are perfect for adding bright splashes of color to shady spots. These prolific bloomers come in various colors, from whites and pinks to deep reds and purples.

Growing Tips:
Soil: Well-draining and rich in organic matter.
Water: Keep the soil moist; they don’t tolerate drought well.
Light: While they prefer shade, they can handle some morning sun.

Varieties to Try:
‘Super Elfin’: Compact and ideal for containers or borders.
‘Infinity White’: Known for its large, pristine white flowers.

Heuchera (Coral Bells): Foliage for All Seasons
Heucheras, or coral bells, are admired for their stunning foliage in various colors, including deep purples, bright greens, and even silvers. Their delicate flowers add additional interest in late spring to early summer.

Growing Tips:
Soil: Well-draining, moderately fertile soil.
Water: Water regularly, but avoid waterlogged conditions.
Maintenance: Cut back dead leaves to encourage new growth.

Varieties to Try:
‘Palace Purple’: Known for its deep purple leaves.
‘Lime Rickey’: Bright lime-green foliage.

Ostrich Ferns: A Dramatic Showstopper
Ostrich ferns are known for their tall, feathery fronds that create a dramatic backdrop in shade gardens. They can grow large, making them ideal for adding height and texture.

Growing Tips:
Soil: Moist, rich, and well-draining soil.
Water: Keep the soil consistently moist.
Maintenance: Cut back fronds after the first frost to tidy the garden.

Varieties to Try:
Matteuccia struthiopteris: The classic ostrich fern with tall, arching fronds.

Japanese Painted Fern: Pretty and Contained
Japanese painted ferns are prized for their unique, colorful fronds, which blend shades of green, silver, and burgundy. They are also more compact and contained than other ferns, making them perfect for smaller spaces.

Growing Tips:
Soil: Well-draining, humus-rich soil.
Water: Keep the soil evenly moist.
Maintenance: Trim old fronds in early spring before new growth appears.

Varieties to Try:
‘Silver Falls’: Noted for its striking silver and green fronds with burgundy stems.

Creating Your Shade Garden
Layering: Plant taller plants like ostrich ferns in the back and shorter plants like heuchera and impatiens in the front.
Color and Texture: Mix foliage and flowering plants to add visual interest.
Pathways: Incorporate winding paths to create a serene woodland feel.

Visit our blog for more tasty recipes and gardening tidbits!

Growing Squash

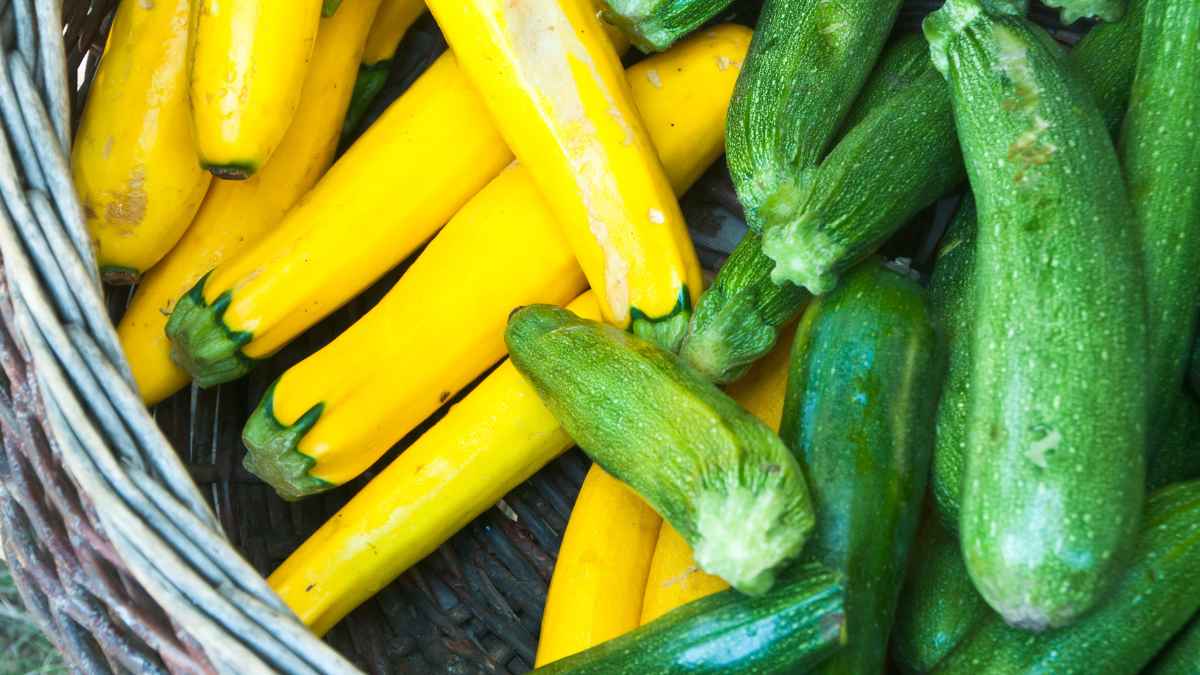
Summer squash is a versatile and prolific vegetable that can thrive in various garden settings. Whether you prefer zucchini, yellow squash, or pattypan, summer squash is relatively easy to grow and provides a bountiful harvest. Here’s a comprehensive guide to help you grow summer squash successfully.

Summer squash is a gardener’s favorite because it matures quickly, often producing its first fruits in as little as 50 days from planting. It’s also incredibly versatile in the kitchen, perfect for grilling, sautéing, baking, or eating raw.

There are several types of summer squash to choose from:

Zucchini: This popular variety comes in green and yellow, and it’s known for its mild flavor and versatility.

Yellow Squash: Also known as crookneck or straight neck squash, it has a slightly sweet flavor and tender skin.

Pattypan Squash: These small, round, scallop-edged squash are great for stuffing and roasting.

Choose a variety based on your culinary preferences and the space available in your garden.

Timing: Summer squash thrives in warm weather and should be planted after the last frost when the soil temperature reaches at least 60°F (16°C). In most areas, this means late spring.

Location: Choose a sunny spot in your garden that receives at least 6-8 hours of direct sunlight daily. Squash plants need plenty of room to grow, so ensure you have enough space to accommodate their spreading vines.

Soil Preparation: Summer squash prefers well-draining soil rich in organic matter. Aim for a pH level between 6.0 and 6.8. Incorporate compost or well-rotted manure into the soil to enhance fertility and drainage. Consider planting in raised beds with heavy clay soil to improve drainage.

Watering and Mulching: Keep the soil consistently moist but not waterlogged. Water the plants deeply at the base, avoiding overhead watering to reduce the risk of fungal diseases. Apply a layer of organic mulch, such as straw or compost, around the plants to retain soil moisture, regulate temperature, and suppress weeds.

Fertilizing: Summer squash is a heavy feeder and benefits from regular fertilization. At planting time, mix a balanced fertilizer into the soil. Once the plants begin to flower, side-dress with a high-phosphorus fertilizer to encourage fruiting.

Harvesting: Harvest summer squash when young and tender for the best flavor. Zucchini and yellow squash are typically ready when 6-8 inches long, while pattypan squash can be picked when they are 2-3 inches in diameter. Use a sharp knife or pruning shears to cut the squash from the vine, being careful not to damage the plant.

Storing and Using Your Harvest: Freshly harvested summer squash can be stored in the refrigerator for up to a week. They are incredibly versatile and can be used in various dishes, from stir-fries and casseroles to salads and baked goods.

Visit our blog for more tasty recipes and gardening tidbits!
All About Lisianthus

Lisianthus is the epitome of a classy, versatile flower. With ruffled petals and elegant buds in various colors, this delicate-looking bloom is prized for its beauty and ability to hold up as a cut flower.

Planting Lisianthus

Timing and Placement: Plant lisianthus transplants two to four weeks before the last spring frost to allow them a period of excellent soil. Space the plants 4 to 6 inches apart for optimal growth, positioning them slightly higher than the soil level.

Soil Requirements: Lisianthus thrives in neutral or slightly acidic (pH 6.5-7.0) and well-draining soil enriched with compost.

Lisianthus Care:

Plant lisianthus in an area that receives full sun for six to eight hours daily.

Soil and Water: Lisianthus prefers well-draining soil enriched with organic matter like compost or leaf mold. The soil should remain moist but not wet. Water as soon as the soil feels dry, avoiding moisture on the leaves. A soaker hose can be an excellent addition to the garden bed to help maintain consistent moisture levels.

Temperature and Humidity: Lisianthus is a heat-loving, drought-tolerant plant that prefers low humidity. It doesn’t tolerate high moisture well and is prone to developing diseases in such conditions.

Fertilizer: Regular feeding benefits lisianthus, so we recommend a commercial flowering plant fertilizer with more potassium than nitrogen every other time you water during the blooming period.

Pruning: Deadheading lisianthus encourages more blooms. In areas where it can be grown as a perennial, cut it back to the ground in winter and cover it with mulch. In extremely low temperatures, a row cover is used for added protection.

Visit our blog for more tasty recipes and gardening tidbits!

Tomato and Cucumber Salad

We love this tomato and cucumber salad because it’s light and refreshing, perfect for barbeques and picnics! Pick up a few tomato plants from Back Home on the Farm and use your tomatoes for this delicious side dish. 

You’ll need:

For the salad:

  • 5 large tomatoes, quartered
  • 1 English cucumber, peeled and sliced
  • 1/2 large red onion, sliced
  • tablespoons chopped fresh parsley
  • tablespoons chopped fresh cilantro
  • 1 pinch kosher salt and 1 pinch black pepper

For the dressing:

  • 1/2 cup olive oil
  • 1/4 cup red wine vinegar
  • teaspoon kosher salt + 1 pinch freshly ground black pepper
  • garlic cloves, minced
  • 1/2 teaspoon honey or brown sugar (optional for low-carb, Keto, or sugar-free diets)
  • teaspoon dried oregano

To make: 

Combine all the vegetables, herbs, salt, and pepper in a salad bowl.

In another bowl, combine all the dressing ingredients. Pour the dressing over the salad and toss to combine. Refrigerate and serve when ready. 

Visit our blog for more tasty recipes and gardening tidbits!